

How to Organize a Small Garage: 7 Steps That Work

Table of Contents
- How to Organize a Small Garage: Start With a Plan
- Step 1: Declutter and Clean Out Before You Buy Anything
- Step 2: Sort Everything With the Four-Box Method
- Step 3: Small Garage Layout Ideas That Protect Your Parking Space
- Step 4: Garage Wall Storage That Gets Gear Off the Floor
- Step 5: Small Garage Organization Ideas for Zones and Workflows
- Step 6: Affordable Garage Organization Ideas and Budget Tiers
- Step 7: Safety, Load Limits, and Installation Basics
- Frequently Asked Questions
Last Updated: October 13, 2026
How to Organize a Small Garage: Start With a Plan
A small garage fails for one reason: no plan.
How to organize a small garage comes down to seven steps, done in order.
Here is the core idea: a small garage is not a storage room with a car in it.
The seven steps below cover decluttering, sorting, layout, wall storage, zones, budget, and safety. Most people finish in a weekend.
Step 1: Declutter and Clean Out Before You Buy Anything
Decluttering comes first because you cannot organize what you have not counted. Buying bins before you sort is the most common mistake we see.
Start by emptying the garage completely. Yes, all of it. Move everything to the driveway or yard on a dry day.
Then clean the empty space:
- Sweep the floor and clear cobwebs from corners
- Check for damp patches, cracks, or pest damage
- Wipe down walls so you can see anchor points
Write those measurements down. You will use them in Step 3.
According to guidance from the U.S. Department of Energy on home energy and moisture, a dry, well-sealed garage protects stored items far better than a damp one.
Step 2: Sort Everything With the Four-Box Method
The four-box method is the fastest way to decide what stays. Label four containers: Keep, Donate, Discard, and Relocate.
The rule is simple.
Here is how to run it:
Box |
What Goes In |
Next Move |
|---|---|---|
Keep |
Items used in the last 12 months |
Returns to a planned zone |
Donate |
Good condition, unused |
Drop off within one week |
Discard |
Broken, expired, unusable |
Bin or recycling |
Relocate |
Belongs in the house |
Move indoors today |
Work one pile at a time. Do not leave the Relocate box sitting in the garage, or it becomes clutter again.
A common mistake is keeping "just in case" items. Those items are the reason your floor space disappeared.
Step 3: Small Garage Layout Ideas That Protect Your Parking Space
The best small garage layout ideas start with the car, not the shelves. Before you buy a single bracket, measure the space and mark the vehicle footprint on the floor with painter's tape. This is the step most people skip, and it is why so many small garages end up with storage they cannot walk around.
Measure the garage, not just the car
Grab a tape measure and record four numbers:
- Interior width at the widest point, wall to wall
- Interior depth from the back wall to the inside face of the closed garage door
- Ceiling height at the lowest obstruction (usually the door track or a light fixture)
Write these down. Every storage decision from here uses them.
Mark the vehicle footprint
A typical compact car needs roughly 2.5 metres (about 8 feet) of width and 5 metres (about 16 feet) of length to park with the doors open. Full-size trucks and SUVs need more, measure your own vehicle's width including mirrors, then add door-swing room on the side you actually use.
Tape that rectangle on the floor. Now walk around it. If you cannot comfortably pass on at least one side, your storage plan is already too aggressive.
Plan around the door and walkway
Three clearances protect parking and access:
- Door swing zone: keep the area directly behind and beside the vehicle clear so doors open fully.
- Walkway: aim for a path wide enough to carry a laundry basket or toolbox, most people find 60 cm (about 2 feet) is the practical minimum.
- Overhead door track: never mount shelving or hooks in the path of the door or its rails. Measure the track height and stay below it.
Choose a layout by garage width
- Single-car garage (roughly 3-3.6 m wide): dedicate one full wall to shallow storage and keep the opposite side open for the car and door swing. Tall cabinets go on the back wall, not the side.
- Two-car garage (roughly 5.5-6 m wide): if both bays must stay open, use the back wall and the strip between the two bays for storage. If only one car parks inside, convert the second bay into a full wall of shelving and a workbench.
- Narrow or oddly shaped garage: favour shallow wall-mounted units (12-14 inches deep) over deep freestanding cabinets, and push bulky seasonal items to overhead racks.
Decide what wins when space runs out
If you cannot fit both cars and storage, rank by daily use. Daily drivers get the floor. Seasonal gear goes up. Hobby equipment that is used weekly gets a dedicated wall; hobby equipment used twice a year goes overhead or gets donated.
Step 4: Garage Wall Storage That Gets Gear Off the Floor
Garage wall storage is where a small garage wins back its floor.
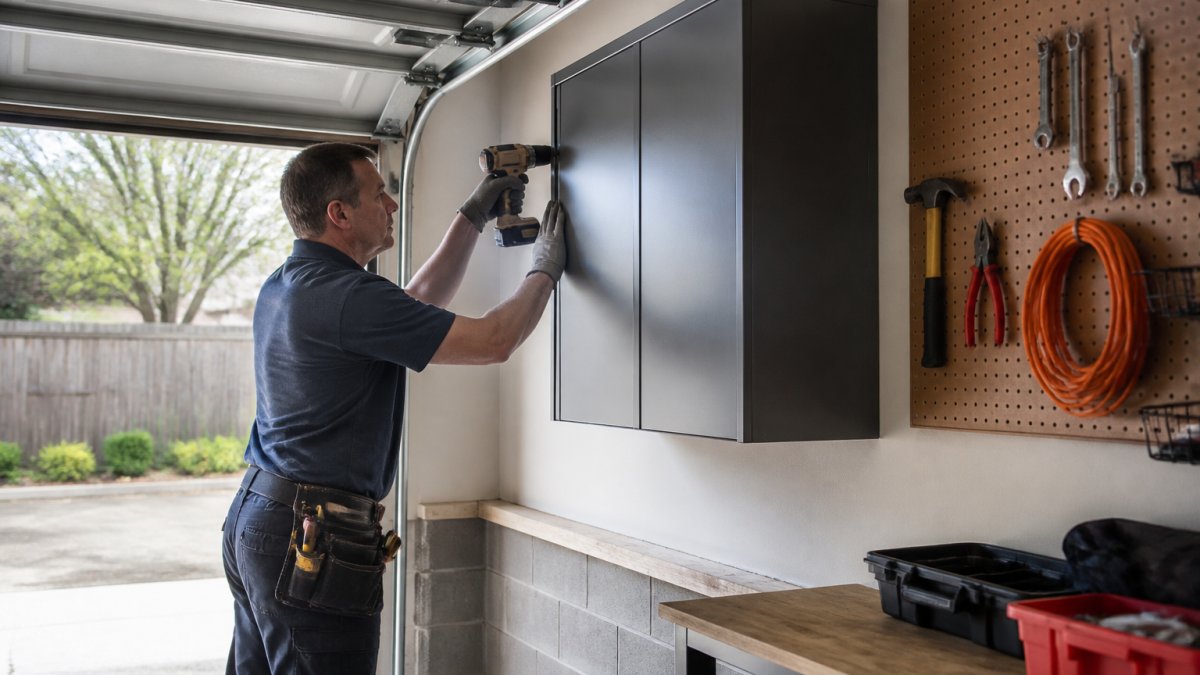
Wall cabinets and shelving free up the ground fast. Look for units that mount securely and hold real weight.
Our own Fortress Metal 2-Shelf Wall Mounted Garage Cabinet is a good example.
For more room, the Asti Wood Wall Mounted Garage Cabinet adds two doors and adjustable shelves with safety devices.
Then add these wall systems:
- Pegboard for hand tools and small parts
- Slat wall for hooks, baskets, and shelves
- Bike hooks to lift bicycles overhead
- A tire rack to stack seasonal wheels flat
Step 5: Small Garage Organization Ideas for Zones and Workflows
Small garage organization ideas work best when you group items by activity, not by type.
Set up four basic zones:
- Parking zone: the car bay, kept clear
- Tool zone: hand tools, power tools, and a workbench
- Seasonal zone: holiday items, camping gear, bulky items
- Sports and garden zone: bikes, balls, mowers, gardening tools
Put frequently used items at waist height. Put seasonal items up high or overhead.
A folding table makes a smart workbench. It folds flat against the wall when not in use, so it steals no floor space.
Label every bin and shelf. Labels are what keep the system working after week one.
Step 6: Affordable Garage Organization Ideas and Budget Tiers
Affordable garage organization ideas do not mean cheap materials that fail in a year. They mean spending where it counts and improvising where you can. This is the section most garage guides skip, so here is a practical breakdown by budget and by whether you are allowed to drill.
Tier 1: Low cost (under a modest budget)
Start here if money is tight or you are testing a layout before committing.
- Pegboard and hooks: a 4x8 sheet of pegboard plus a hook assortment clears hand tools off the floor for very little.
- DIY shelving: two-by-four lumber and plywood shelves on simple brackets cost a fraction of steel cabinets and hold serious weight when anchored into studs.
- Reused containers: clear plastic totes, old coolers, and sturdy cardboard (lifted off concrete) work fine for seasonal gear.
- Bike and ladder hooks: screw-in utility hooks lift bikes and ladders overhead for a few dollars each.
Tier 2: Mid range (most homeowners)
Once the layout is proven, upgrade the zones you touch daily.
- Wall-mounted cabinets: steel or wood units keep tools and chemicals off the floor and out of reach of children.
- Slat wall or track systems: interchangeable hooks and baskets let you reconfigure without re-drilling.
- Overhead racks: ceiling-mounted racks hold seasonal bins and bulky items that would otherwise eat floor space.
For a durable mid-tier upgrade, our Ready-To-Assemble Freestanding Steel Garage Cabinet (28” W x 31” H x 18” D) combines a drawer and two doors for flexible storage, with a fully adjustable shelf and a 455-lb weight capacity. Add casters to turn it into a mobile workstation, or use the leveling legs to compensate for uneven floors.
Tier 3: Premium (enthusiasts and pros)
- Modular steel cabinet systems: welded frames, locking doors, and adjustable shelving built for daily heavy use.
- Car lifts: only worth it if you have the ceiling height and a vehicle you actually service. Look for ALI certification.
- Custom workbenches and tool chests: built to your height and workflow rather than bought off a shelf.
If you rent or cannot drill
Many leases forbid wall anchors, and some walls (concrete block, tile, metal siding) resist them anyway. Damage-minimizing options:
- Freestanding shelving units: metal or resin racks that stand on their own and come down without a trace.
- Stackable bins and totes: build vertical storage without touching a wall.
- Tension-mounted or pressure-fit racks: useful for lightweight items, though not for heavy tools.
- Over-door and over-fridge-style hooks: repurposed for garage doors and shelving edges.
How to decide what to buy first
Buy the cheapest thing that solves the problem, then upgrade only the zones you use daily. A common pattern is to start with pegboard and DIY shelves, live with the layout for a month, and then invest in cabinets for the two or three zones that still feel crowded.
Step 7: Safety, Load Limits, and Installation Basics
Safety comes before storage. An overloaded shelf or a badly mounted cabinet is a real hazard, especially above a car.
Follow these basics:
- Check the load rating on every shelf and bracket
- Mount heavy units into wall studs
- Keep heavy items low, light items high
- Never store propane or fuel near a heat source
For car lifts, look for ALI certification (Lift Certification FAQ). The Automotive Lift Institute sets the safety standard for lift design and testing.
Load limits matter most overhead. A ceiling rack rated for light boxes should never hold a spare engine.
Climate matters too. In humid areas, steel and sealed cabinets beat cardboard and bare wood.
A small garage only stays organized when the system fits the space.
At Garage Mosaic, we build storage that earns its footprint. Our Steel Garage Cabinet uses a 3-point locking system and adjustable shelves, our wall cabinets keep gear off the floor, and our ALI-certified car lifts protect the vehicle at the centre of it all.

Frequently Asked Questions
What are the 5 steps to organize a garage?
Clear everything out and clean the floor first, sort items into keep, donate, sell, and discard piles, plan zones for parking, tools, and seasonal gear, install storage that uses your wall and ceiling space, then label and return items by how often you use them. Skipping the sort step is the most common reason garages get cluttered again within a few months.
What should you not store in a small garage?
Keep propane tanks, gasoline cans, paint thinners, and other flammable liquids out of a garage that gets hot, and never store them near a water heater or pilot light. Cardboard boxes attract pests and hold moisture, so move paper records and fabric items indoors. If your garage is humid, avoid storing anything that rusts easily without sealed containers.
How do I make the most of vertical space in a small garage?
Start with the wall above your workbench and the space over the garage door. Wall cabinets, pegboards, and slat wall panels hold hand tools and frequently used items at eye level. Reserve ceiling racks for bulky seasonal gear like ladders, kayaks, and holiday bins. Check that wall anchors are rated for the load, and mount heavy cabinets into studs rather than drywall alone.
How can I keep a small garage organized after decluttering?
Set a 15-minute reset each week: return tools to their labeled spots, sweep the floor, and put anything that does not belong in the garage back in the house. Give every item a home, because clutter returns when things have no place to go. A quick monthly check of your storage zones catches overflow before it spreads back onto the floor.